Fabulous Flowers Re-use Frozen Yogurt Shop Spoons to Make Spring Garden Art | ||||
| Supplies: |
|  | ||
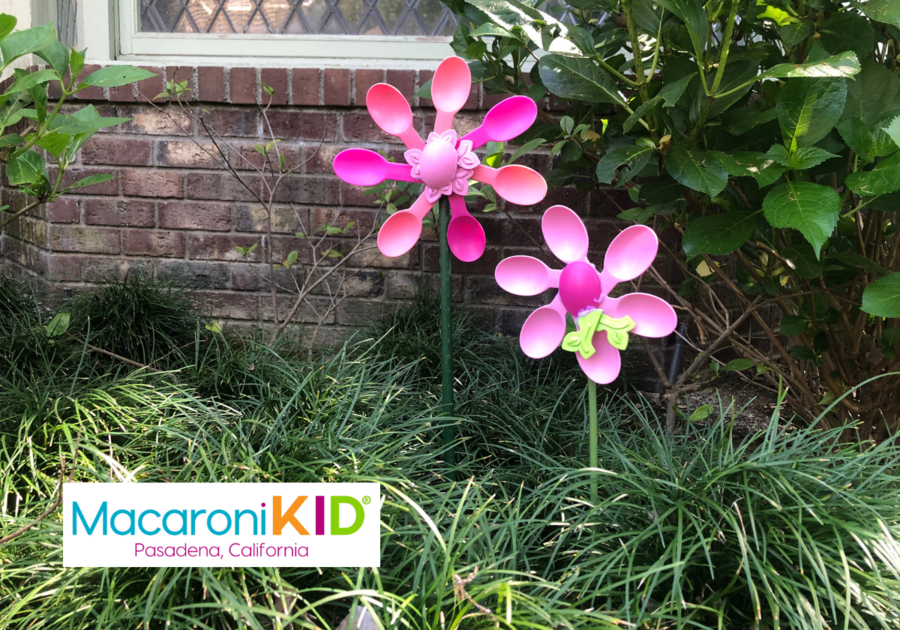
| About: | Whenever my son and I enjoy a trip to the fro-yo shop, I can’t help but to want to reuse the sturdy spoons that come with our purchase. Many of them have made their way into his lunch box and are used over and over. They are fairly easy to cut with a sharp pair of scissors, and the shape lends itself easily to that of flower petals. Here, I’ve used them to make some really fun garden art that will survive the season outdoors. For the “stems,” I used green garden stakes that I’d stowed in my garage after they’d broken off, but you could also paint sticks or paint stirrers green. Because hot glue is simply plastic with a low melting point, this whole craft can be tossed into your recycling bin once they’ve faded and lost their glory. | |||
| Instructions: | ||||
For Daisy Style Flowers | 1. Use 6 or 7 spoons for daisy style flowers. Cut the spoon handles on the diagonal about an inch and a half down from the bowl of the spoon. If you cut them at an approximately 45-degree angle, they will fit neatly together like a wheel. | 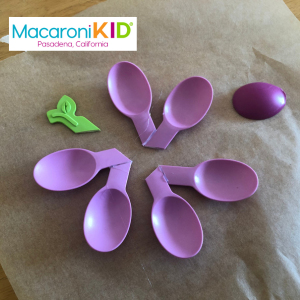 | ||
2. Lay down parchment paper over your workspace, which hot glue will not stick to. Hot glue the cut end of each to the smooth side of the next handle right next to the point. I found it easiest to glue them together in pairs, let them cool fully, then glue each pair to the next pair. | ||||
3. Cut the handle completely off of another spoon, curving the cut to match the other end. Adding a bead of glue around the rim, attach this piece to the center of the daisy, convex side out. | 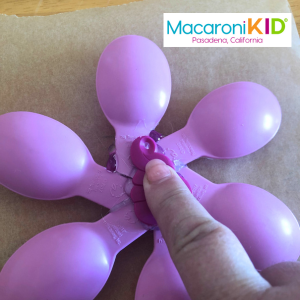 | |||
4. Cut off the handle tips of green spoons and glue on “leaves,” either in front or in back of the daisy as you are so inspired. | ||||
5. Use an extra handle tip or scrap, and glue over the back of your daisy where several pieces come together. Press down the extra piece to provide stability. Cover any exposed seams with an extra bead of glue. | 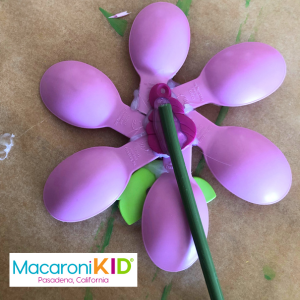 | |||
6. Once completely cool, glue your green stick onto the back to serve as a stem, covering the tip with glue. | ||||
7. “Plant” in directly in the ground in a cool, shady spot and enjoy. | ||||
| Instructions: | ||||
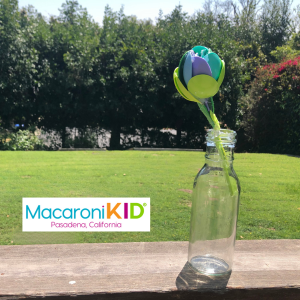
For Rosebud Style Flowers | 1. Use 5 or 6 spoons to create the blossom of a rosebud style flower. Cut the spoon handles off at a V-shaped point just at the base of the handle. Glue one edge of the bowl part of each “petal” to the middle of the next at an angle and allow to cool. Make 2 or 3 pairs, then glue the pairs together to form a cylinder. | 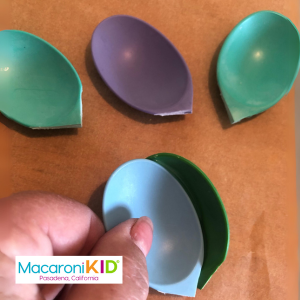 | ||
2. Using the rounded end of 3 or 4 extra stems, cut several vertical slits into each to mimic the stamen found in the center of many flowers. Glue the handle pieces together at the un-slit end and allow to cool. Slide the “stamen” into the cylinder from the bottom and glue in place so the stamen tips are about equal in height to the tips of the petals. | 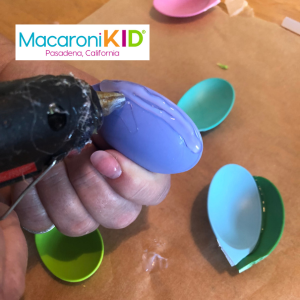 | |||
3. Cut the handles off 5 or 6 more spoons, preferably green ones, leaving a V-shaped point at the base of each spoon bowl. These will serve as the outer petals of the rose bud. Using a bead of glue around the rim, glue each to the outside of the cylinder, in an overlapping fashion. | 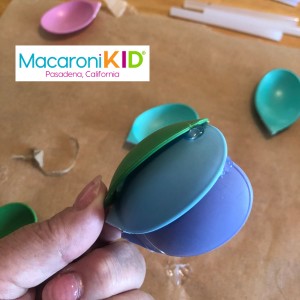 | |||
4. Using several green spoon handles or a small garden stake, glue a stem to the base of your rose blossom. Once cool, cut and add some extra “leaves” until you feel you’ve created a work of art. | 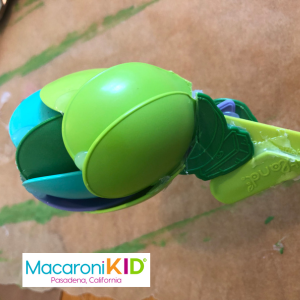 | |||
5. Place in a bottle vase or “plant” in the ground and enjoy. | 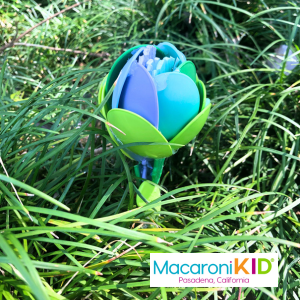 | |||